Read 10 web pages
Here’s a complete guide to making soft, tender Sourdough Sandwich Bread at home. Unlike crusty artisan loaves, this version is enriched with milk, butter (or oil), and a touch of honey to create a pillowy crumb and golden crust that’s perfect for everyday sandwiches and toast.
Why Sourdough Sandwich Bread is Different
Traditional sourdough has a crusty exterior, open crumb structure, and is baked at high temperatures (450°F+). Sandwich sourdough, on the other hand, is enriched with fats and dairy, has a tighter, more uniform crumb (so fillings don’t fall through), and is baked at lower temperatures (350-375°F) to preserve moisture and softness.
The key tweaks for softness:
-
Moderate hydration (65-70%) instead of high hydration
-
Added fats (butter or oil) to coat gluten strands
-
Milk proteins to tenderize the crumb
-
Lower baking temperature
Core Ingredients
| Ingredient | Amount | Notes |
|---|---|---|
| Active sourdough starter | 150g (about 1/2 cup) | Fed and bubbly, passes float test |
| Bread flour | 500g (about 3½ cups) | Higher protein for structure |
| Whole milk | 300g (about 1¼ cups) | Room temperature; water works too |
| Butter (or olive/avocado oil) | 60g (4 tbsp) | Softened for butter, room temp for oil |
| Honey (or sugar) | 15-30g (1-2 tbsp) | Feeds starter, tenderizes crumb |
| Salt | 10g (about 2 tsp) | Fine sea salt preferred |
(Optional additions: 50g whole wheat flour for nuttiness, 1 tbsp milk powder for extra softness)
Step-by-Step Method (Overnight)
Day 1: Mix & Bulk Ferment
-
Mix the dough – In a large bowl, whisk together active starter, room temperature milk, and honey until smooth. Add bread flour and salt, mix into a shaggy dough.
-
Add butter – If using butter, incorporate it gradually while kneading. If using oil, mix it in with the liquids.
-
Knead – Knead for 8-10 minutes (by hand or stand mixer with dough hook) until smooth and elastic. The dough should pass the windowpane test — stretch a small piece thin enough to see light through it without tearing.
-
Bulk ferment – Place dough in an oiled bowl, cover, and let rise at room temperature for 4-8 hours or overnight until increased by about 50-70% (not necessarily doubled). Perform 4 sets of stretch-and-folds every 30 minutes during the first 2 hours to build structure.
Day 2: Shape, Proof & Bake
-
Shape – Lightly flour your counter. Gently press dough into a rectangle the width of your loaf pan. Fold bottom third up, top third down (like a letter), then roll from one short end into a tight log. Pinch the seam and ends closed.
-
Second rise – Place dough seam-side down in a greased 9×5-inch loaf pan. Cover and let proof for 2-4 hours at room temperature, or overnight in the refrigerator. The dough is ready when it has risen about 1 inch above the rim of the pan. Don’t let it double — over-proofing causes collapse.
-
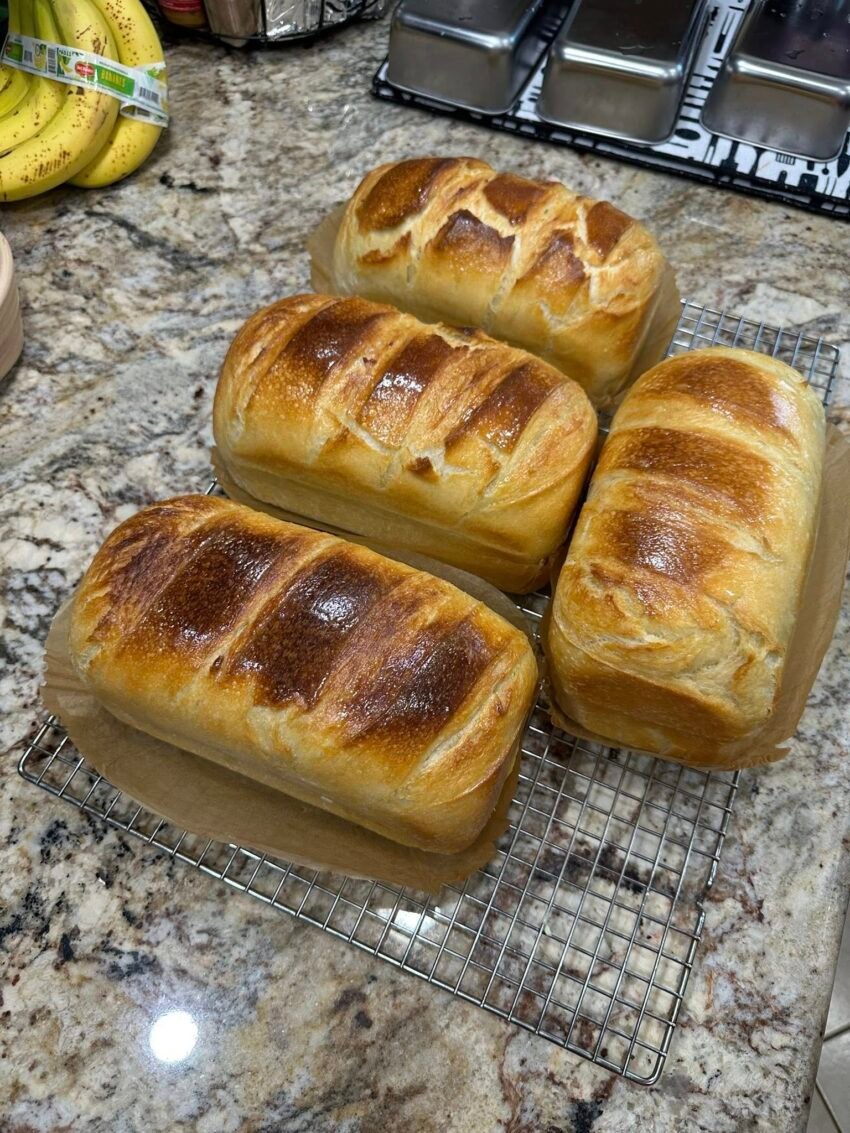
Bake – Preheat oven to 375°F (190°C). Optional: brush top with milk or egg wash for a shiny crust. Bake for 35-40 minutes until deep golden brown and internal temperature reaches 195-205°F.
-
Cool – Remove from pan immediately. Brush top with melted butter for a soft crust. Cool completely on a wire rack for at least 2 hours before slicing. Do not slice warm — it will become gummy.
The Tangzhong Method (For Extra Softness)
For bread that stays soft for days, use this Asian baking technique:
Tangzhong (flour paste):
-
25g bread flour + 125g milk
-
Whisk in small saucepan, heat over medium-low, stirring constantly until it thickens into a pudding-like paste.
-
Cool completely before adding to dough ingredients.
This gelatinized starch locks in moisture, extending freshness without preservatives.
Common Mistakes & Fixes
| Problem | Likely Cause | Solution |
|---|---|---|
| Dense loaf | Starter not active enough | Feed starter until it doubles within 4-6 hours; use at peak |
| Bread collapses | Over-proofed in pan | Stop when dough is 1″ above rim, not doubled |
| Gummy interior | Sliced while warm | Wait at least 2 hours before slicing |
| Hard, thick crust | Oven too hot | Lower to 350-375°F; brush with butter after baking |
| Dough too sticky | High humidity or weak flour | Reduce water by 5-10%; use bread flour |
Storage & Shelf Life
-
Room temperature (3-4 days): Store in bread bag or wrapped in a kitchen towel. Avoid plastic bags — they trap moisture and encourage mold.
-
Freezer (up to 3 months): Slice first, wrap slices in parchment, then place in freezer bags. Toast slices directly from frozen.
-
Do NOT refrigerate — the cold temperature (35-40°F) accelerates staling.
Flavor Variations
| Variation | Add-ins |
|---|---|
| Savory | 1 cup shredded cheddar + chopped jalapeños in final knead |
| Herb | 1 tbsp fresh rosemary or thyme during stretch-and-folds |
| Sweet | Cinnamon + raisins, or dried cranberries |
| Whole wheat | Substitute 50-75g of bread flour with whole wheat flour |
Quick Visual Cues
| Stage | What to look for |
|---|---|
| Starter ready | Doubled in size, bubbly, passes “float test” |
| Kneaded enough | Passes windowpane test (stretches thin without tearing) |
| Bulk ferment done | Puffy, 50-70% larger, small bubbles visible |
| Proofing done | 1 inch above pan rim, springs back slowly when poked |
| Baked properly | Internal temp 195-205°F, sounds hollow when tapped |
Equipment You’ll Need
-
9×5-inch loaf pan (metal conducts heat better than glass)
-
Food scale (essential for accuracy)
-
Digital thermometer
-
Bench scraper
-
Dough whisk or mixer with dough hook
Enjoy your homemade sourdough sandwich bread! It’s a game-changer for lunches, toast, and everything in between. 🍞